As I am currently working on a Fraud Analytics Web Application based on Shiny (currently on beta version, more later on this blog) I found myself asking: wouldn’t be great to add live chat support to my Web Application visitors?
It would indeed!
[caption id=“attachment_490” align=“aligncenter” width=“200”] an ancient example of chatting - Camera degli Sposi, Andrea Mantegna 1465 -1474[/caption]
But how to do it?
Unfortunately, looking on Google didn’t give any useful result.
Therefore I had to find it out by myself.
step by step tutorial
Going to the core, you can find here below a step-by-step tutorial on how to add a live chat to your Shiny App.
I did it using jivochat , mainly because it offers a good free entry-level; but with little changes you can replicate it with other chat services providers.
1. Create an account on jivochat
just type jivochat.com into your address bar, and you will find on the top right the ‘sign up’ button

2. Add a new site
to add a new site, log in into jivochat and then press the “Add site” button

3. Specify Site Url and language
You will be prompted by a window asking you to specify the URL of your site and the chat language.

4. Get the Javascript Code
After pressing the ‘Add’ button you will be prompted with a window showing the javascript code. Copy it and go to the next step

5. Go to your Shiny App Root Folder and create a create a .txt file named ‘chat.js’
into your App Root Folder ( the one created by Rstudio itself when you created the new app) create a .txt file, and then change it into a javascript file named ‘chat.js’. Be sure to change the file extension, removing the .txt default.
if (you need help with that & you are a Mac user)
{ go to : [https://www.youtube.com/watch?v=pbEaKTcQcv4](https://www.youtube.com/watch?v=pbEaKTcQcv4) }
else if (you need help with that & you are a Windows user)
{go to: [http://www.wikihow.com/Change-a-File-Extension](http://www.wikihow.com/Change-a-File-Extension) }
else{do some googling for help}
I know what you are thinking : couldn’t we just create a javascript file? Of course you can! But I was looking for a way anyone could follow, from beginners to experts.
6. Remove the “script” tags from chat.js
you can open ‘chat.js’ using Rstudio (link) itself or any other text editor.
after removing the tags, your script should look like that:
[code language=“javascript”] function(){ var widget_id = ‘u3ltusnn0Q’; var s = document.createElement(‘script’); s.type = ‘text/javascript’; s.async = true; s.src = ‘//code.jivosite.com/script/widget/’+widget_id; var ss = document.getElementsByTagName(‘script’)[0]; ss.parentNode.insertBefore(s, ss);})(); [/code]
be sure that no change was introduced during the copy-paste job.
6. Go to your Shiny App ui.R file and insert a call to chat.js
you can do this adding the following code just after the function indicating the type of page Shiny is going to use (fluidpage(),navbarpage() etc):
[code language=“r”] tags$head(includeScript(“chat.js”)) [/code]
For instance, your code could look like that:
[code language=“r”] shinyUI(fluidPage( tags$head(includeScript(“chat.js”)), titlePanel(“my very first chat”) )) [/code]
As you can see, we are simply adding into the head of the app html code a script, retrieved from the ‘chat.js’ file.
7. Enjoy your chat
Everything is ready to start your chat support experience, but in order to see your chat actually working you will have to deploy your app, which can be easily done using shinyapps.io .
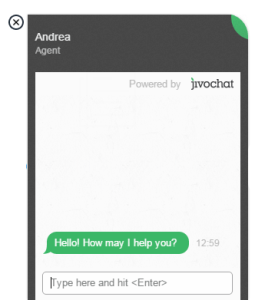
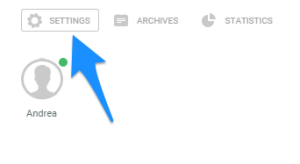
Moreover, jivochat gives you the possibility to change some settings within your chat, like colors and texts fonts. To do that you just have to go to the jivochat admin panel and press the ‘settings’ button.
If you are planning to develop a Shiny app for professional or commercial purposes, adding a live chat support could be a good way to enhance user experience. This post showed you in details how to do it.
As always feel free to comment for (kind) criticism and any possible ( related :) ) question.